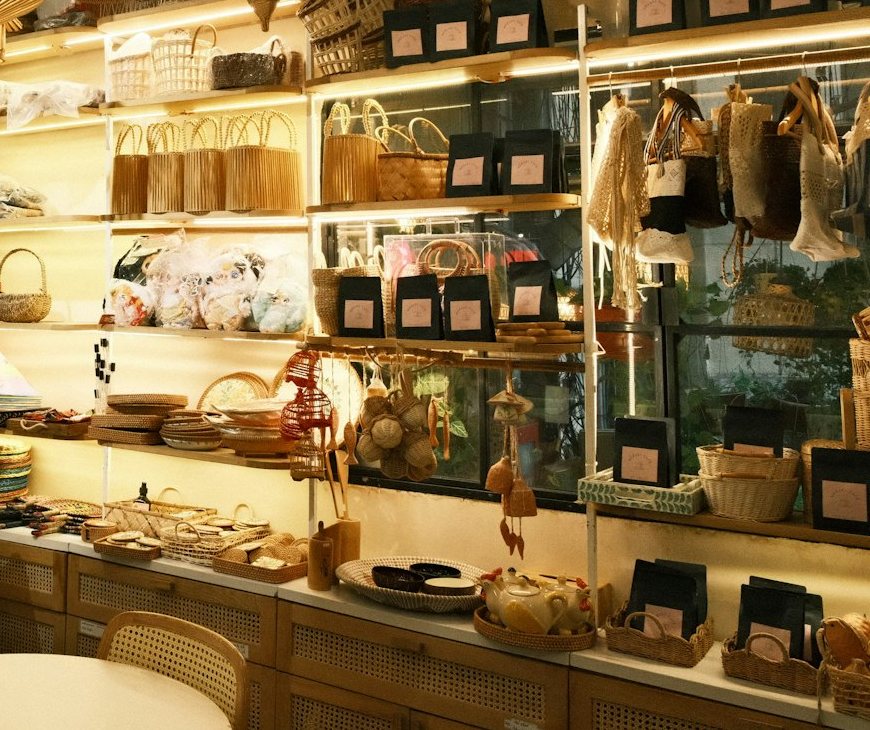
A good shop interior does three jobs at once: it pulls people in from the street, moves them past as much merchandise as possible without feeling pushy, and makes paying easy. None of that requires a large budget. It does require decisions made in the right order, starting with the floor plan and ending with the details people actually notice.
This guide is for owners planning a first location, refreshing a tired space, or briefing a designer.
Quick answer
- Pick a layout that matches how people shop your category. Grid for need-based shopping, loop for browsing larger stores, free-flow or boutique for small, discovery-driven shops.
- Keep the first few steps inside the door clear. People need a moment to adjust before they notice merchandise.
- Light in layers. Ambient light for the room, accent light on what you want to sell, task light at the counter.
- Put the cash wrap where staff can see the door and the floor.
- Budget in phases and hold a contingency. A 10 to 20 percent reserve is a common rule of thumb for fit-outs.
Start with the brief, not the fixtures
Before choosing shelving or paint, write a one-page brief that answers:
- What do you sell, and how many SKUs need to be on the floor at once?
- Is the typical visit quick and purposeful (pharmacy, hardware) or slow and exploratory (gifts, fashion, home goods)?
- What is your average transaction, and does it involve consultation, fitting, wrapping or pickup?
- How much back-of-house storage do you need for stock, deliveries and staff?
- What must stay fixed: columns, plumbing, the storefront, landlord requirements?
Store layout types
Most retail plans are variations on four patterns. Small shops often combine two, for example a free-flow front with a grid of wall shelving.
| Layout | How it works | Best for | Watch out for |
|---|---|---|---|
| Grid | Parallel aisles of gondolas or shelving | Groceries, pharmacies, hardware, high SKU counts | Feels utilitarian; hard to create moments of discovery |
| Loop (racetrack) | A main path circles the floor, with displays inside and along walls | Larger stores where you want shoppers to pass every department | Needs enough floor area; a cramped loop feels like a corridor |
| Free-flow | Fixtures placed in clusters with no fixed path | Fashion, gifts, lifestyle stores | Can feel messy without clear focal points; harder to keep tidy |
| Boutique (shop-in-shop) | Floor divided into small zones or alcoves, each with its own theme | Multi-brand stores, concept stores, collections by room or use | Each zone needs its own lighting and signage to read clearly |
Choosing between them
If customers know what they want, a grid helps them find it fast. If they come to browse, slow them down with a loop or free-flow plan and put your best stories at natural pause points. In a narrow storefront, a simple central path with the walls doing most of the selling usually beats an elaborate loop.
The decompression zone
The decompression zone, sometimes called the transition zone, is the first stretch of floor inside the entrance. Retail researchers have long observed that people tend to walk through it without registering much, because they are adjusting to the light, temperature and scale of the space.
Practical rules of thumb:
- Keep it open and uncluttered. Avoid putting small, detailed merchandise or important signage right at the door.
- Size it to the store. In a small shop this may be only a few feet; in a larger store it can be considerably deeper.
- Do not put baskets, a greeter’s desk and a sale rack all in the first step inside. Place baskets just past the threshold, where people are ready to pick them up.
Sightlines and focal points
A sightline is what a shopper can see from a given spot. Good sightlines make a store feel larger and pull people toward the back.
- Keep fixtures low near the front. Tables and low gondolas (waist to chest height) let people see across the floor. Put tall fixtures on the perimeter.
- Give the back wall a reason to be visited: a bold color, a lit display or a key category.
- Create focal points at decision points. Where the path turns or splits, place a display that tells a story: a styled table, a mannequin group, a seasonal set.
- Check sightlines from the cash wrap. Staff should be able to see most of the floor and the entrance without leaving the counter, which helps service and loss prevention.
Shoppers in right-hand-traffic countries are often observed to drift right after entering. Treat that as a hint, not a law.
Fixtures
Fixtures are the furniture of retail and often one of the largest line items, so be deliberate.
Types to consider
- Wall systems (slatwall, slotted standards, panel systems): flexible, maximize vertical space, good for changing assortments.
- Gondolas: freestanding double-sided shelving; efficient but can feel like a supermarket.
- Display tables and nesting tables: ideal for the front of the store and for telling a product story.
- Garment racks and rails: straight, T-stand, four-way; mix heights to avoid a wall of identical rails.
- Vitrines and display cases: for small, high-value or fragile items.
- Custom joinery: strongest identity, longest lead time, least flexibility.
Fixture rules of thumb
- Choose modular or movable fixtures for at least part of the floor so you can reset for seasons and events. Our guides to pop-up shops, flagship stores and experiential retail cover temporary, larger and event-led formats.
- Put best-sellers and high-margin products between waist and eye level.
- Leave room to breathe; overfilled fixtures look like a stockroom.
- Plan main aisles generously. Many designers aim for main circulation routes several feet wide so two people and a stroller can pass, and never let secondary aisles drop below the minimum accessible width required where you are.
Lighting layers
Lighting has an outsized effect on how merchandise looks and how long people stay. Think in layers.
| Layer | Purpose | Typical sources |
|---|---|---|
| Ambient | Even base light so people can move safely and see the whole space | Recessed downlights, linear fixtures, indirect cove lighting |
| Accent | Draws attention to displays and makes products look their best | Adjustable track heads, spotlights, shelf and case lighting |
| Task | Light for specific work | Cash wrap, fitting rooms, wrapping station |
| Decorative | Sets the mood and expresses the brand | Pendants, chandeliers, neon or lit signage |
Commonly used rules of thumb:
- Contrast creates emphasis. Accent lighting several times brighter than the surrounding ambient light (ratios of about 3:1 to 5:1 are often cited) makes a display stand out.
- Color temperature sets the tone. Warm white (around 2700K to 3000K) feels residential and inviting; neutral white (around 3500K to 4000K) feels crisp and clean. Pick one family and stay consistent.
- Color rendering matters for products. If customers judge color (clothing, cosmetics, textiles, food), look for lamps with a high color rendering index, often 90 or above.
- Use adjustable track wherever displays change; fixed downlights cannot follow your merchandise.
The cash wrap
The cash wrap is the checkout counter, and it does more than take payment.
- Location: Near the front and to one side lets staff greet people and watch the exit; toward the back draws people through. Either works if staff can see the floor and entrance.
- Size: Allow room for the point-of-sale system, bagging or wrapping, and a small staging space for held items. Storage underneath for bags, tissue and supplies is essential.
- Impulse zone: The queue area is a natural place for small, low-cost add-ons. Keep it tidy so it does not block the line.
- Accessibility: Plan a lowered section of counter that a seated person can use. The required height and length depend on your jurisdiction, so confirm with your designer or local authority.
Signage and wayfinding
Signage has a hierarchy, and mixing the levels is what makes stores feel chaotic.
- Exterior and storefront signage: the name and what you sell, readable from across the street.
- Directional and category signage: where things are, readable from across the floor.
- Point-of-purchase signage: product stories, benefits and offers, readable from arm’s length.
- Price and information labels: consistent placement and typeface.
Keep fonts and colors few, write short, and remove old promotions promptly. Exterior signs often need landlord approval and a permit.
Accessibility
Accessible design is a legal requirement in many places and good business: clear routes and reachable products help parents with strollers, older shoppers and people carrying bags, not only wheelchair users.
Points to plan for from the start:
- An accessible entrance, including the door hardware and threshold.
- Clear routes through the store that stay clear after merchandise is added.
- Reach ranges for key products and a usable section of counter.
- An accessible fitting room if you offer fitting rooms.
Requirements vary by country, state and city, and they can change. Check the rules that apply to your space with a licensed architect, designer or your local building department rather than relying on general guides, including this one.
Budgeting in phases
A fit-out budget is easier to control when you treat it as a sequence of phases, each with its own approvals.
| Phase | What happens | Budget notes |
|---|---|---|
| Brief and site assessment | Define needs; review the lease, existing conditions and landlord rules | Low cost but high impact; avoid skipping it |
| Concept design | Layout options, mood and material direction | Choose the layout here; changing it later is expensive |
| Design development and documents | Detailed plans, lighting, fixture drawings | Get early pricing on custom fixtures |
| Permits and approvals | Building permit, sign permit, landlord sign-off | Timelines vary widely by city |
| Bidding and contracting | Comparable quotes on the same drawings | Compare scope line by line, not only totals |
| Construction and install | Build-out, then fixtures, lighting focus and graphics | Hold a contingency; a 10 to 20 percent reserve is a common rule of thumb |
| Merchandising and soft opening | Stock the floor, train staff, adjust | Leave budget for changes after you see real traffic |
To save without hurting the result, keep sound existing finishes, use standard fixtures with custom finishes, and spend first on lighting and the storefront.
Working with a designer and contractor
Most fit-outs involve some mix of a retail or interior designer, an architect (often required for structural, exit or major mechanical changes) and a general contractor.
Before you sign:
- Ask what is included: number of layout options, revisions, lighting design, fixture design, permit drawings, site visits.
- Ask how fees are structured (fixed fee, hourly, percentage) and what triggers additional charges.
- Get contractor bids on the same drawings and specifications so you are comparing like with like.
If you are planning a broader renovation, our renovation design planning guide covers sequencing, bids and punch lists in more detail. If you run a food business, see our restaurant interior design guide.
Pre-opening checklist
- Walk the floor as a first-time customer, starting from the sidewalk.
- Check every aisle with a stroller-width object.
- Re-aim accent lights after merchandise is on the floor.
- Test the cash wrap with a real transaction and a queue.
FAQ
What is the best layout for a small store?
For browsing-led shops, free-flow or boutique with selling walls and a few low central tables. For many small items, a compact grid.
How big should the decompression zone be?
There is no fixed size. In a small shop it might be a few feet just inside the door; in a larger store it is deeper. The rule of thumb is to keep the first steps inside clear of detailed merchandise and important signs.
Where should the checkout counter go?
Put it where staff can see the entrance and most of the floor. Front-side placements suit small shops with one staff member; rear placements can draw people through larger stores.
What color temperature is best for retail lighting?
Warm white suits home goods, food and lifestyle shops; neutral white suits electronics, pharmacies and crisp modern brands. Consistency matters more than the exact number.
Do I need a permit to renovate a shop?
Often yes, especially for changes to walls, electrical, plumbing, exits or signage. Rules vary, so check with your building department and landlord first.